About this post
This post is a record of my learning journey through this AWS tutorial video:
https://youtu.be/Nzv-tzU-UAw?si=lvIXGK1LKYM1snyz. Aside from the content covered in the video, I also learned how to set up billing alerts to monitor my expenses, and how to clean up the resources created to avoid unnecessary charges.
⏯️ The result can be found here: https://youtu.be/UhF5I0qh2gk
Account Creation
It seems that I created my AWS account with my school account a while ago, which makes me ineligible for the free tier when I try to set up a new account with my personal email when confirming my identity.
I therefore decided to proceed with a paid account and set up billing alerts to monitor my expenses.
Setting up billing alerts
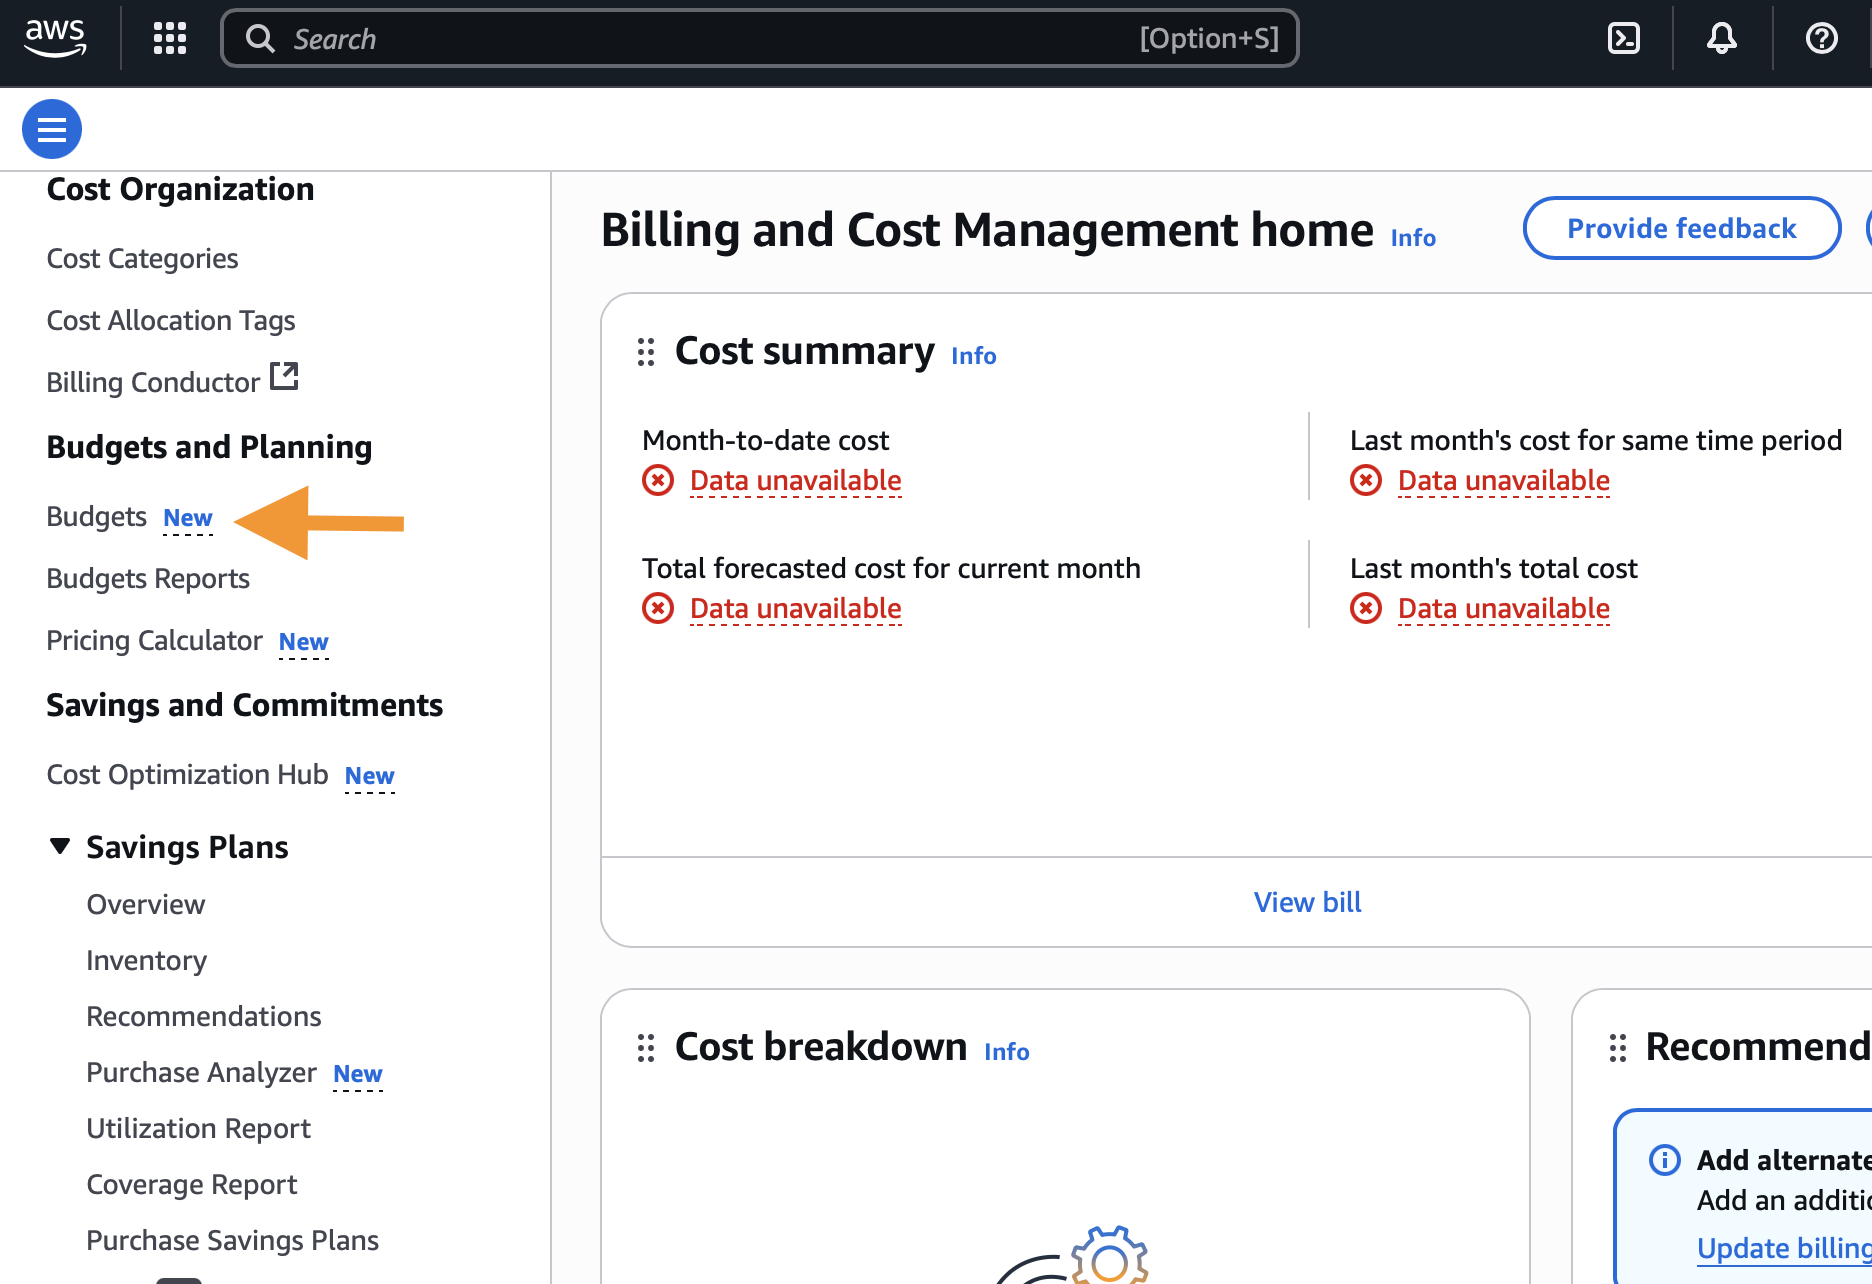
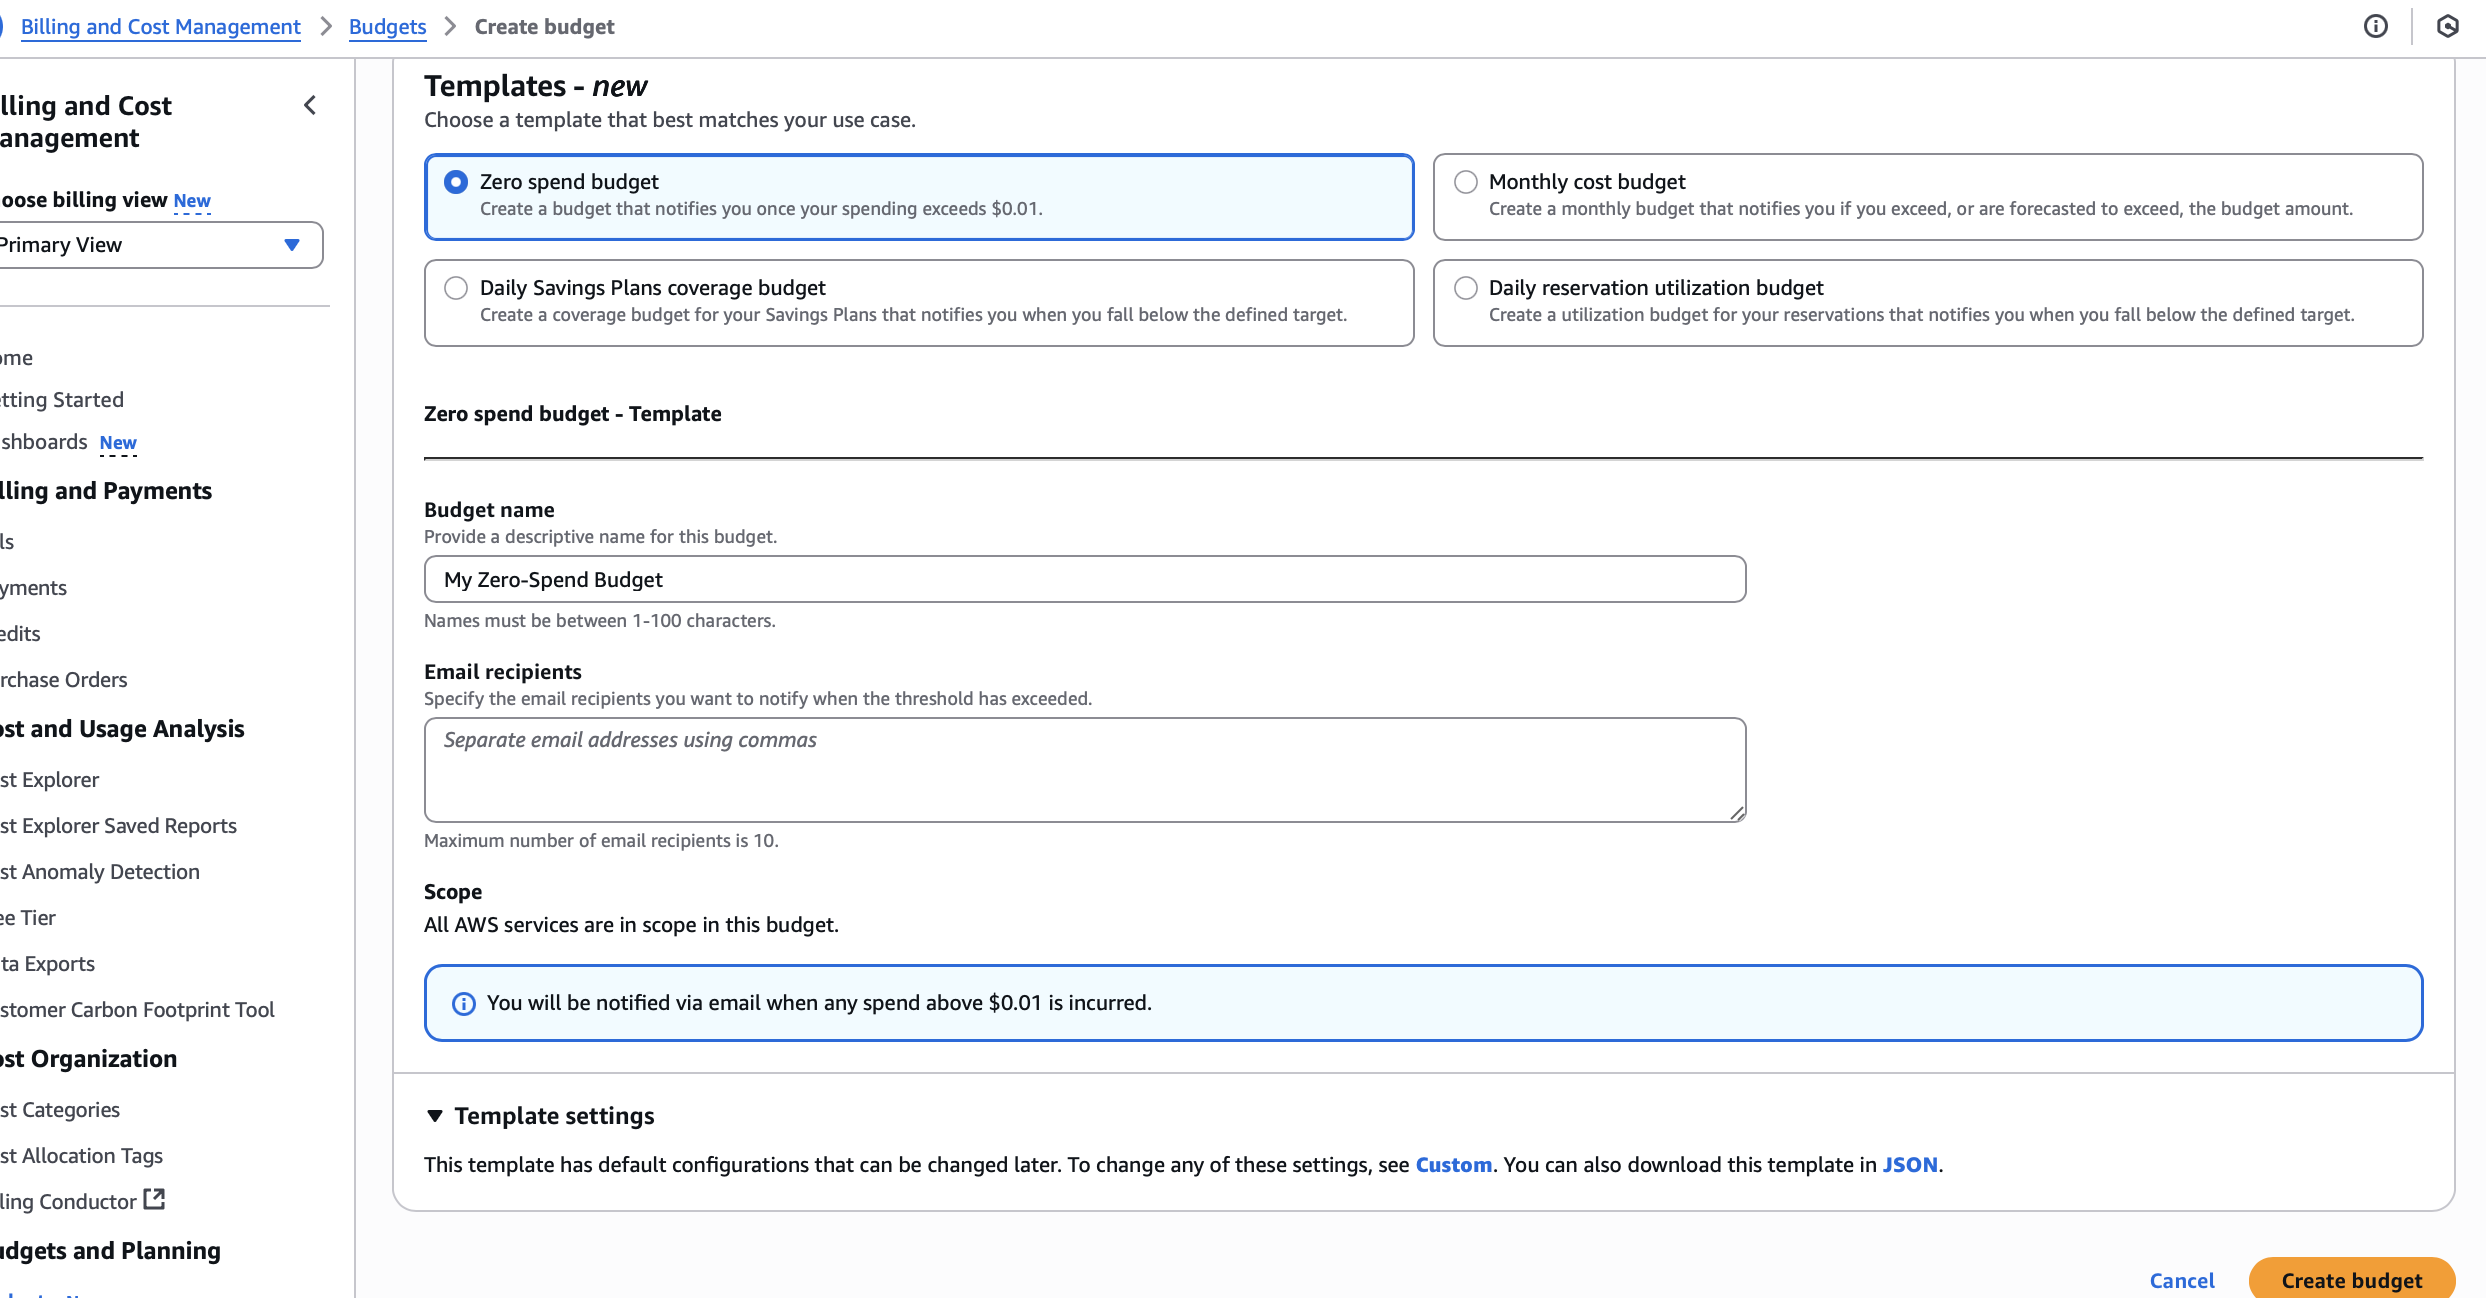
Click on “Create budget”, and we’re good to go!
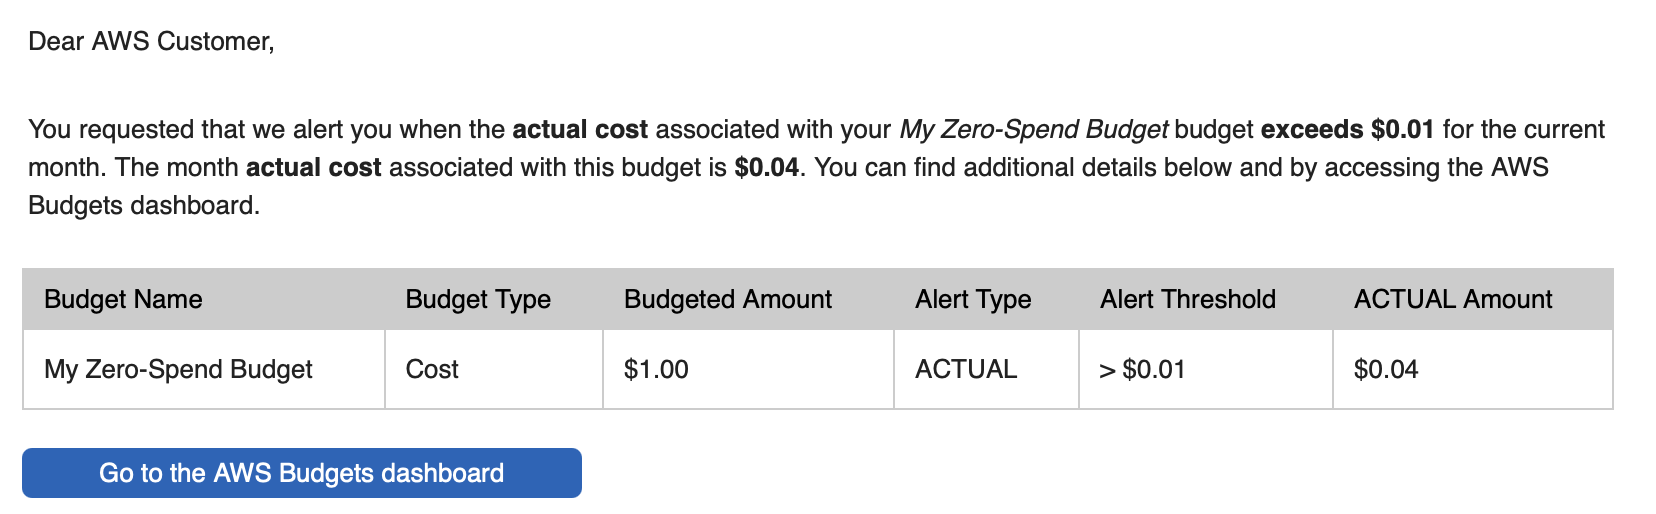
(Something like this will show up in the end)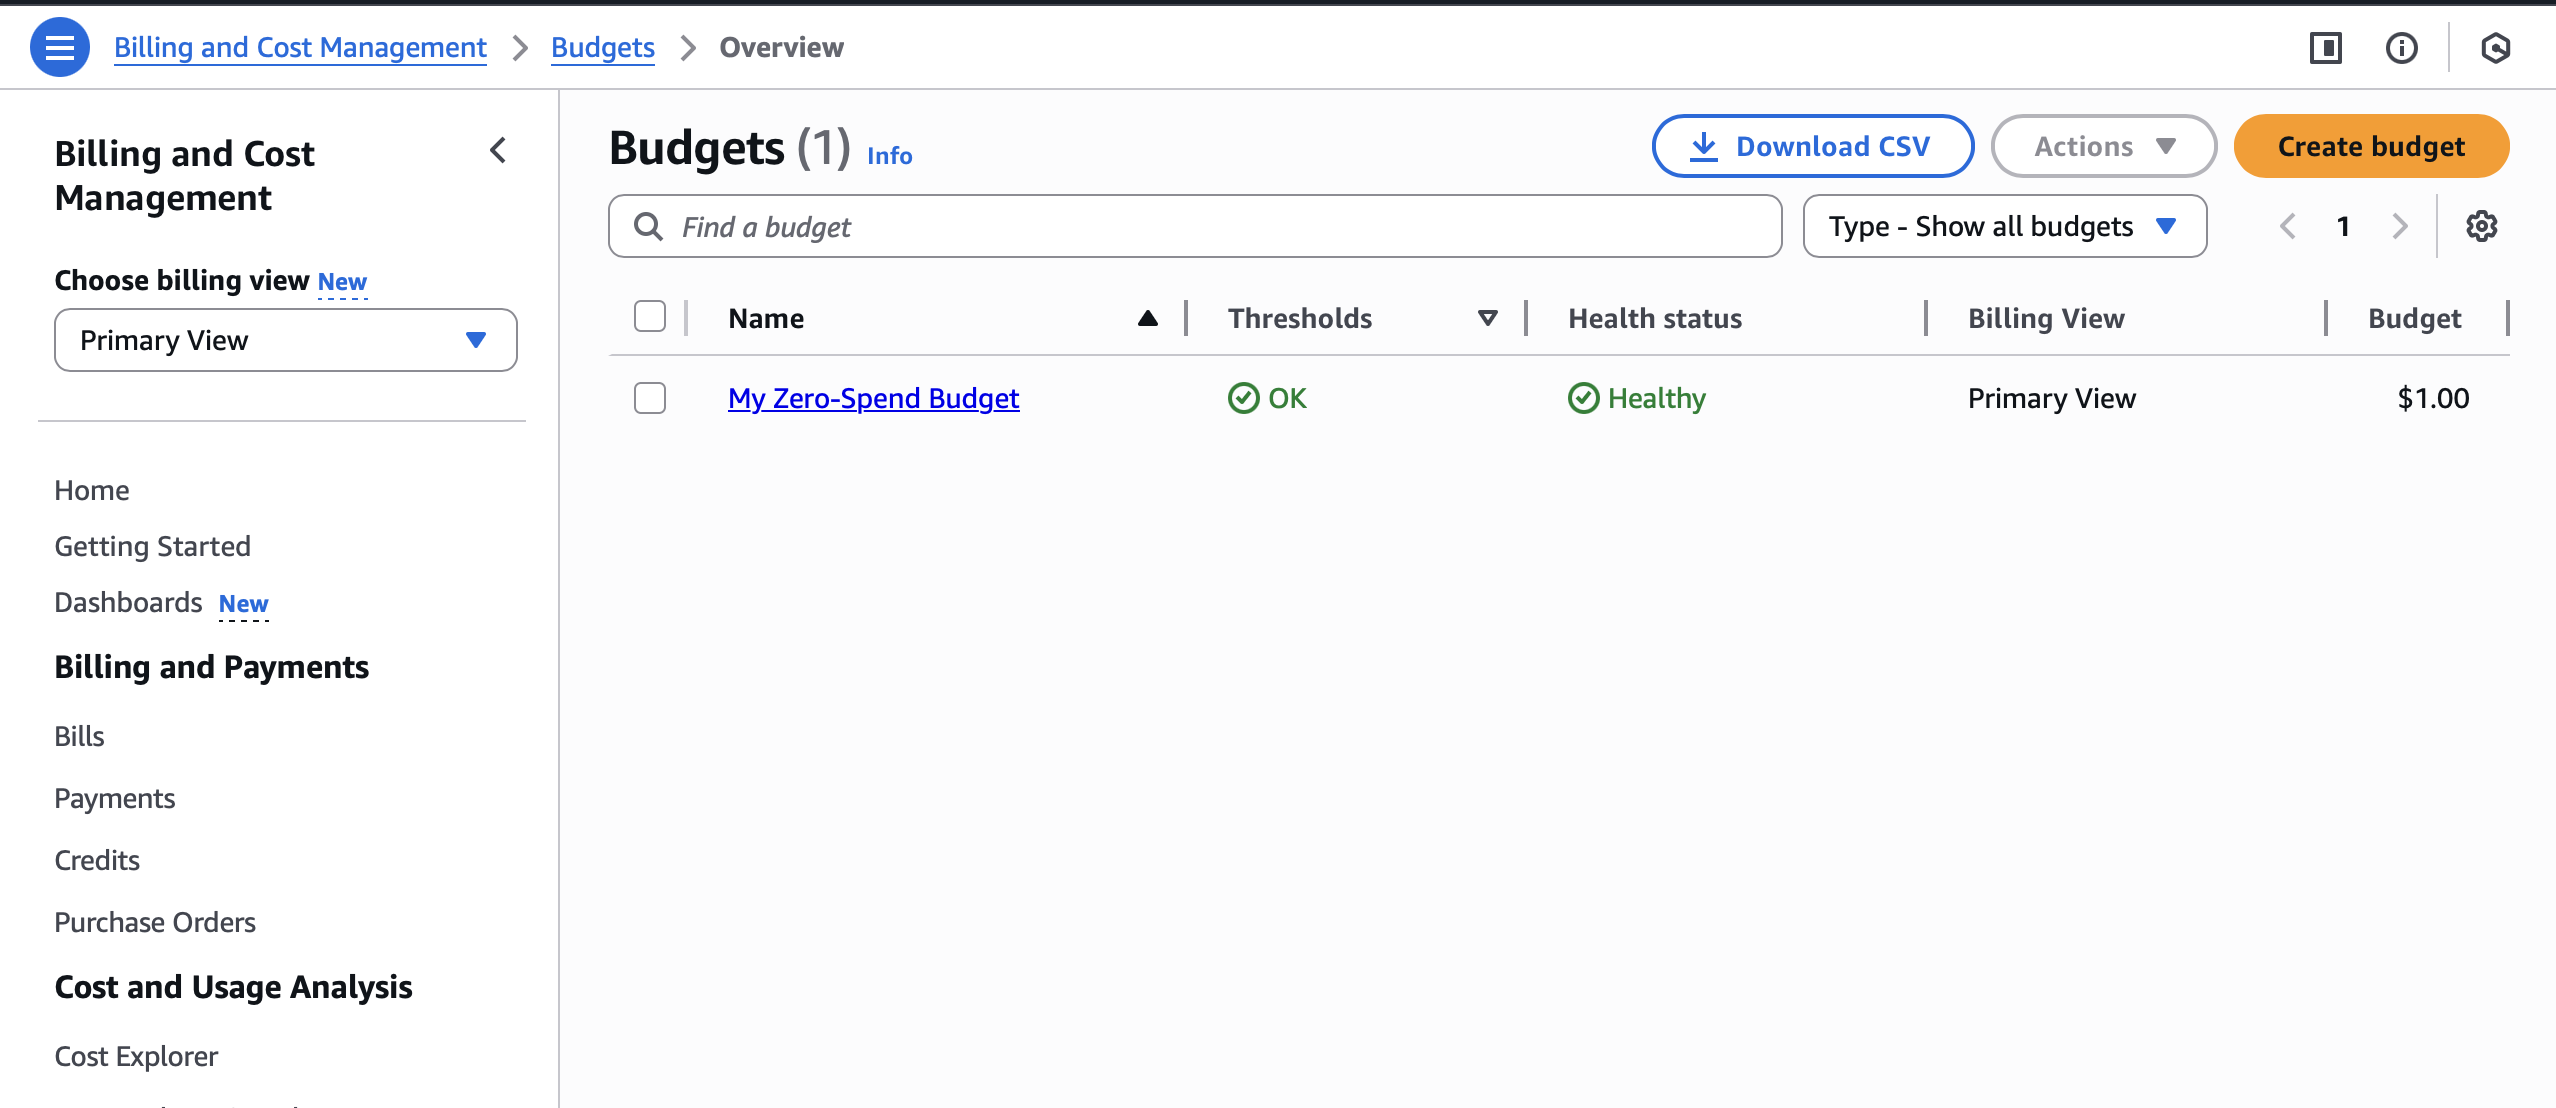
UPDATE
As shown below, I got alerted that my actual cost is $0.04 on the day after, which is reasonable since the pricing is per hour (and my instance was running for an hour or two)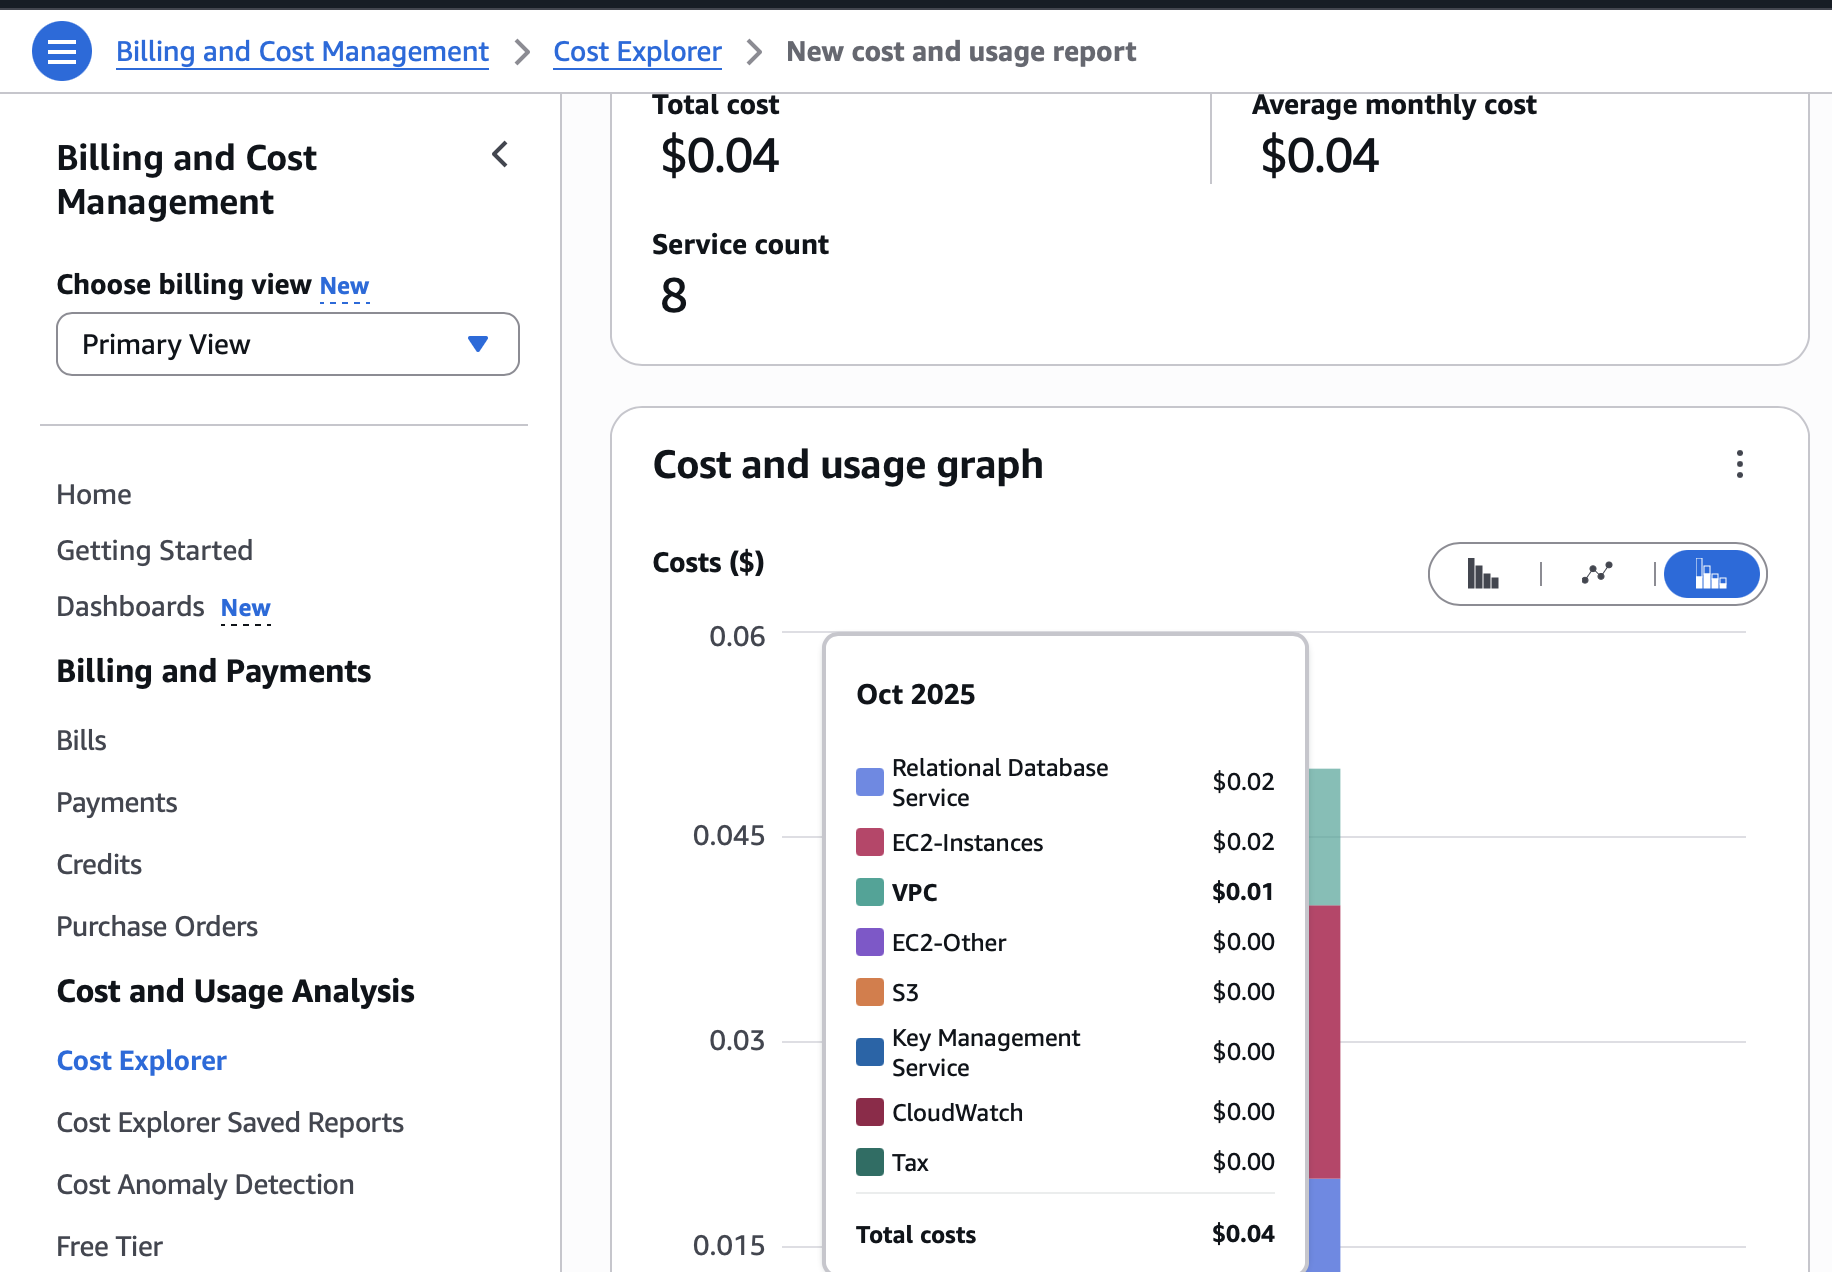
Setting up an EC2 instance
Since HTTP through port 80 requires extra setups, port 8080 is used instead.
Create S3 bucket
The site of this tutorial is hosted on an S3 bucket, which makes the bucket name part of the URL.
Note that the bucket is set to public, so the public access settings need to be adjusted.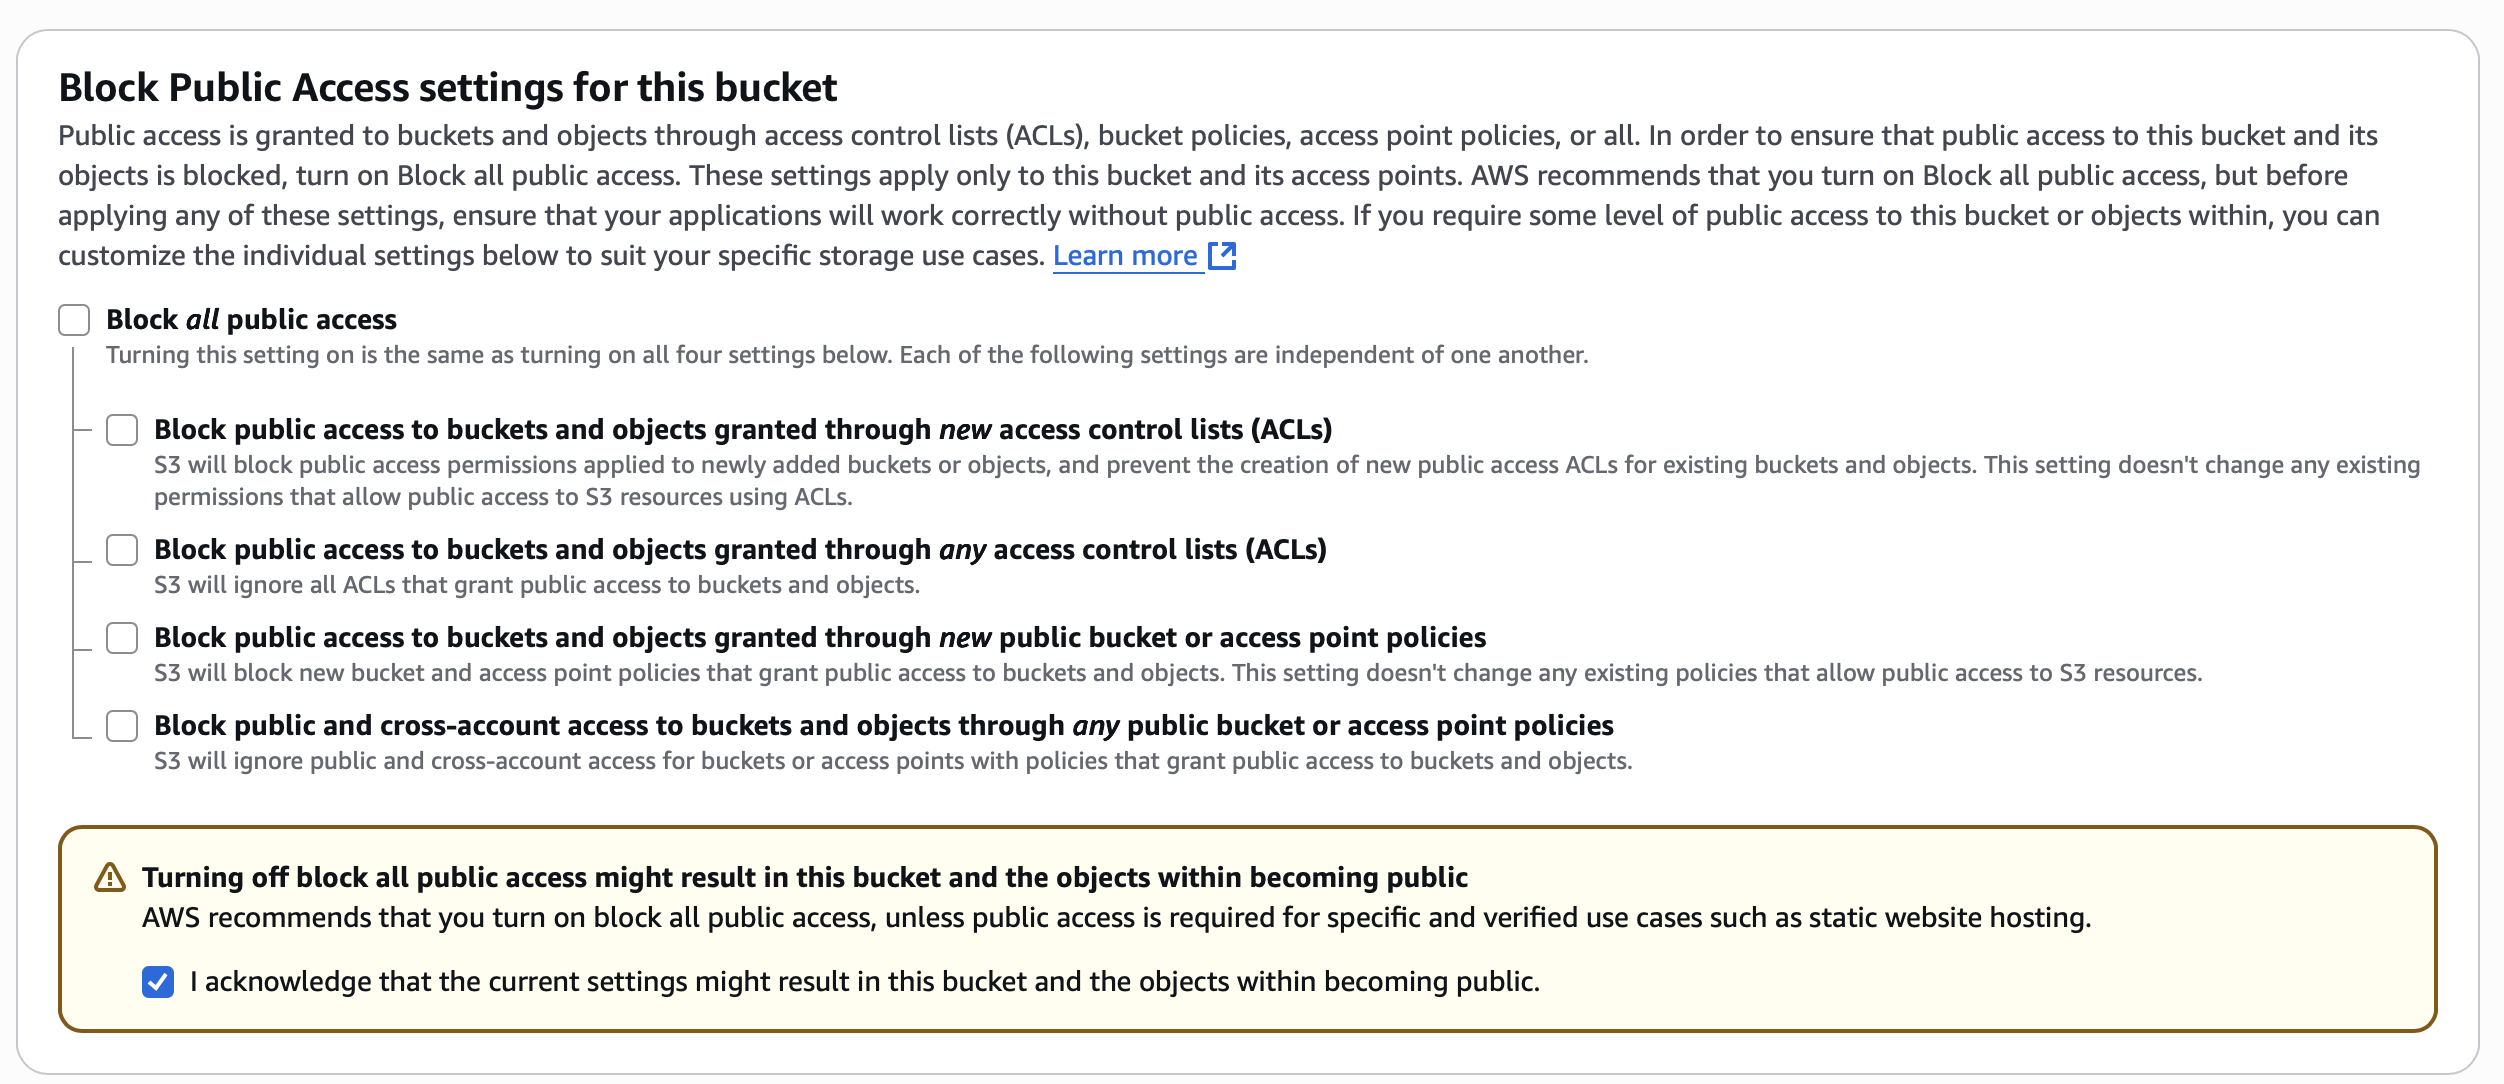
An extra setup to make the site public
Edit bucket policy is required. This is because disabling “block public access” does not means the bucket or objects are public, only means than you can make them public. (referece: https://stackoverflow.com/a/70473871)
1 | { |
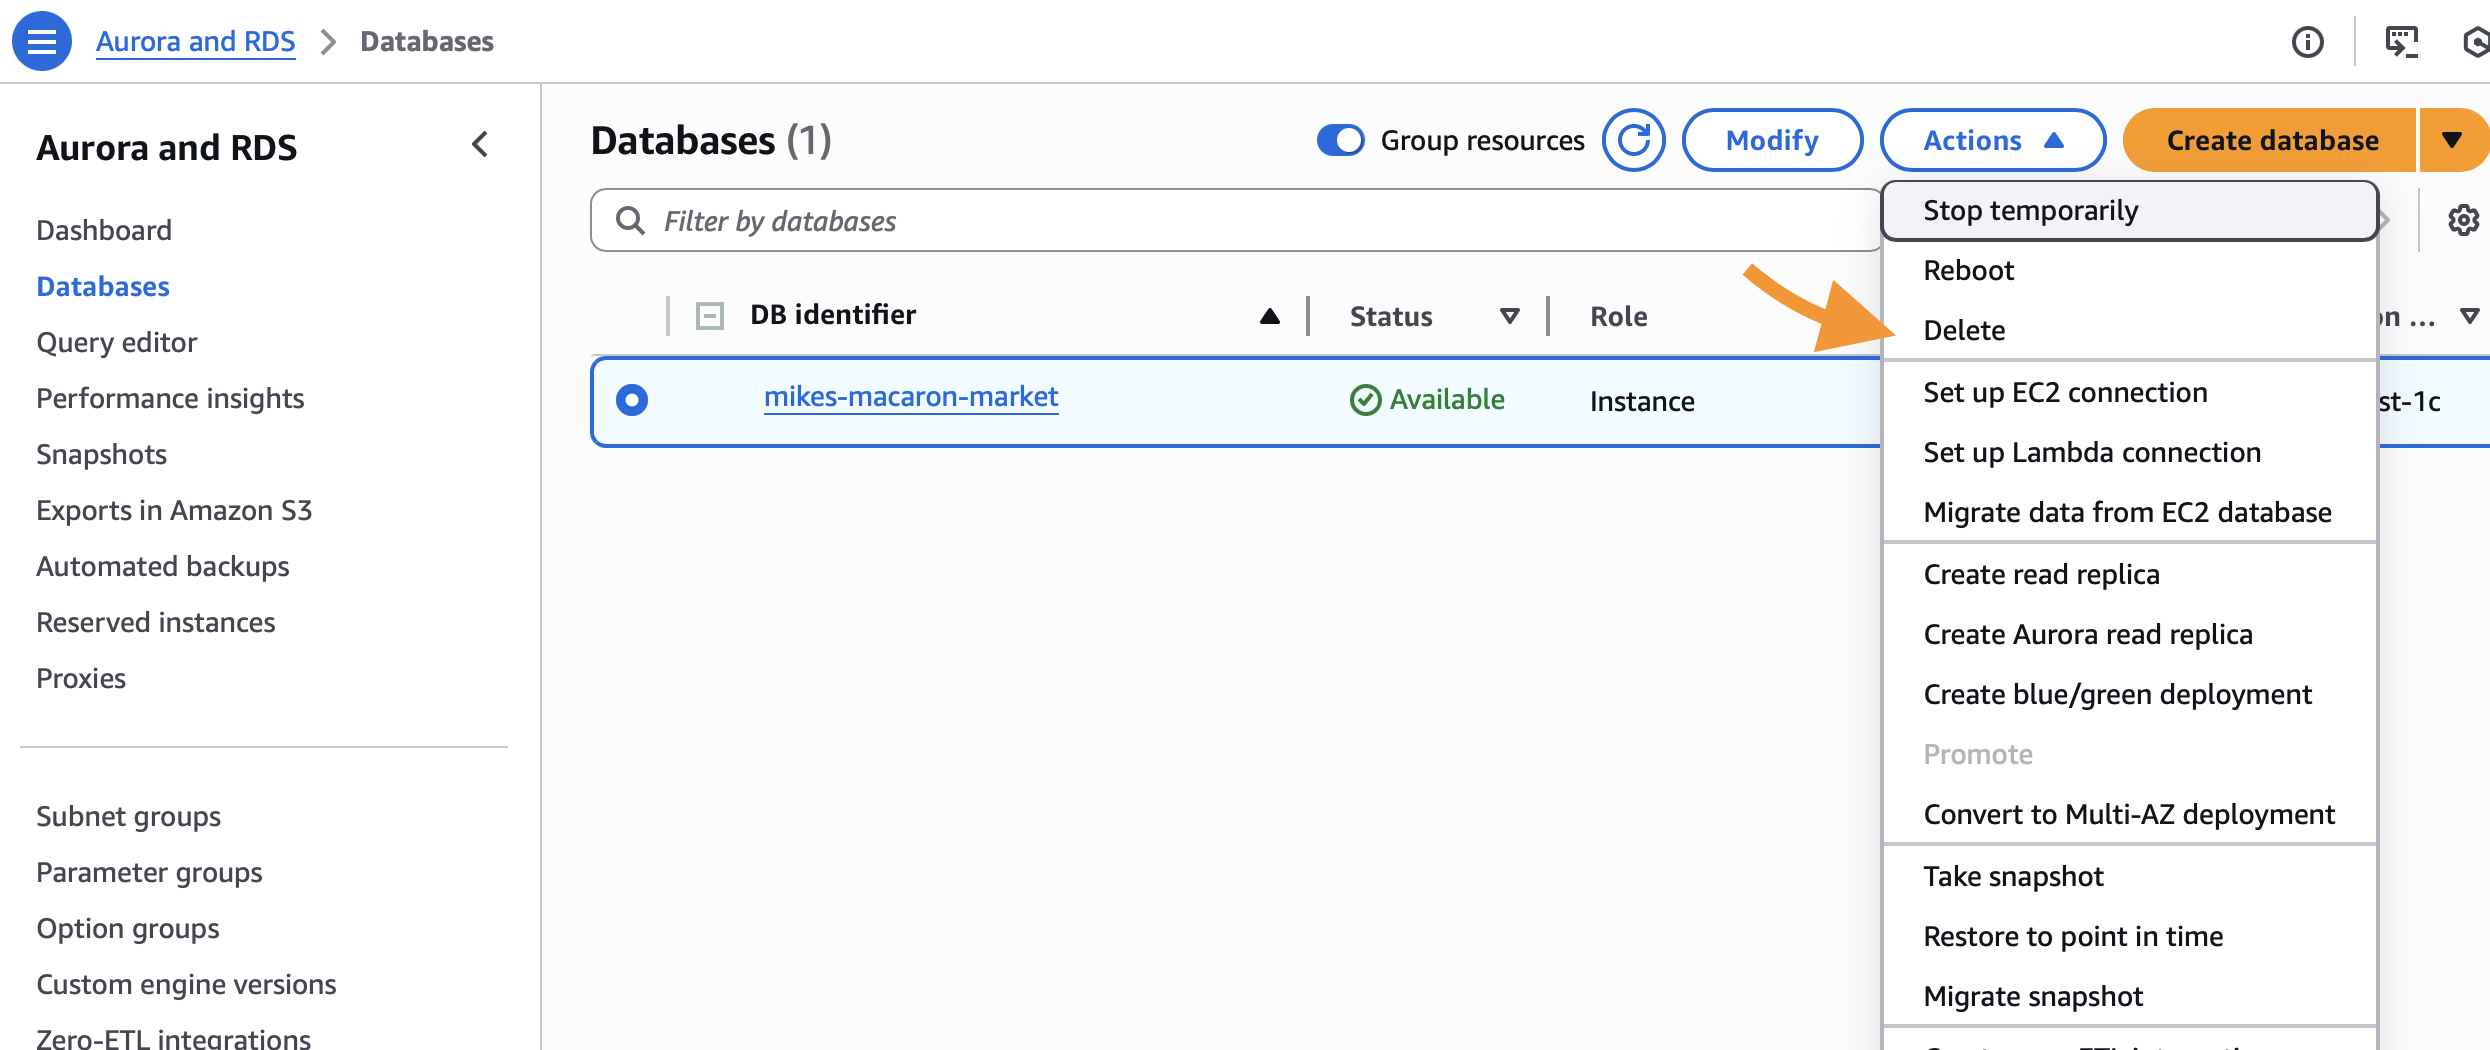
Create database with RDS
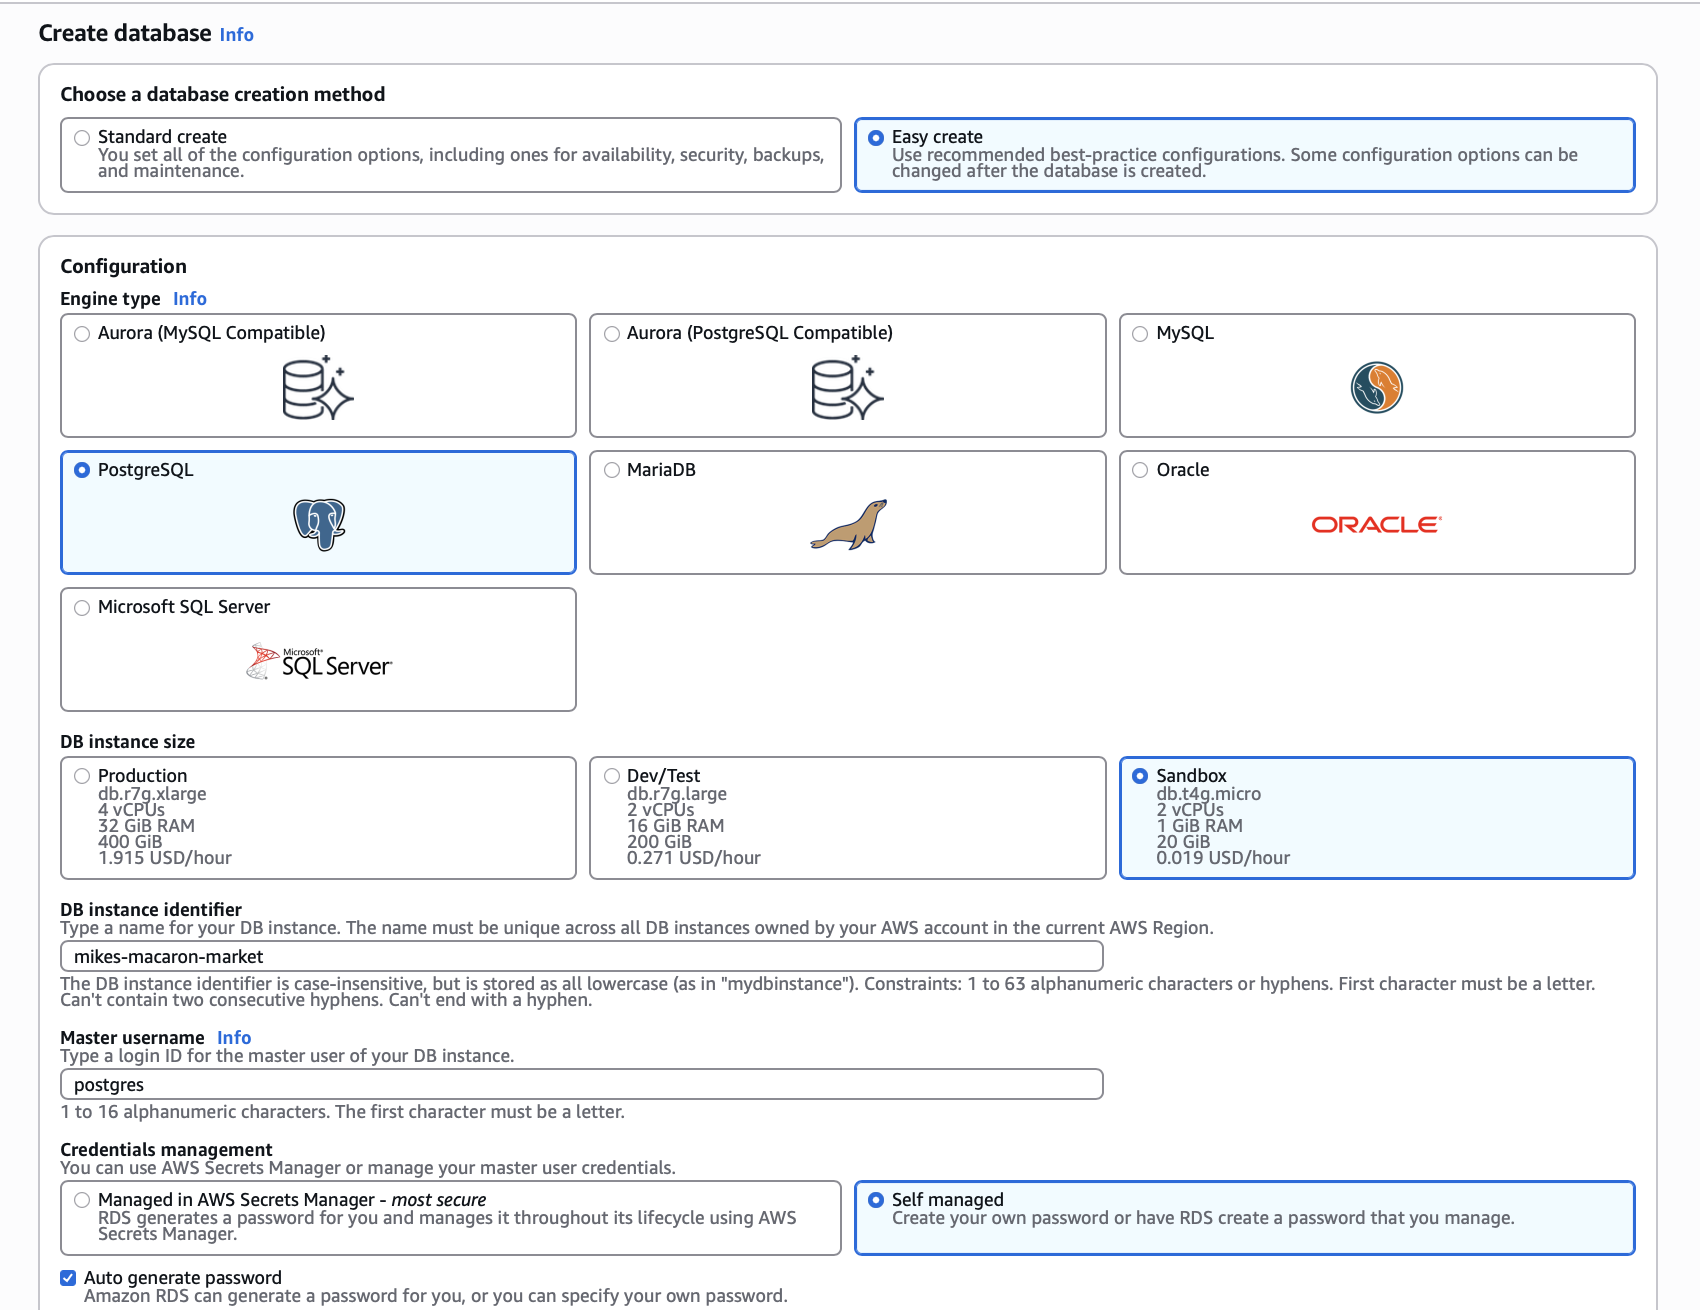
Note that here we connect to the EC2 instance that we created earlier.
After the database is created (which takes a while), an endpoint will be provided, which is provided in the popup message or can be found in the RDS dashboard.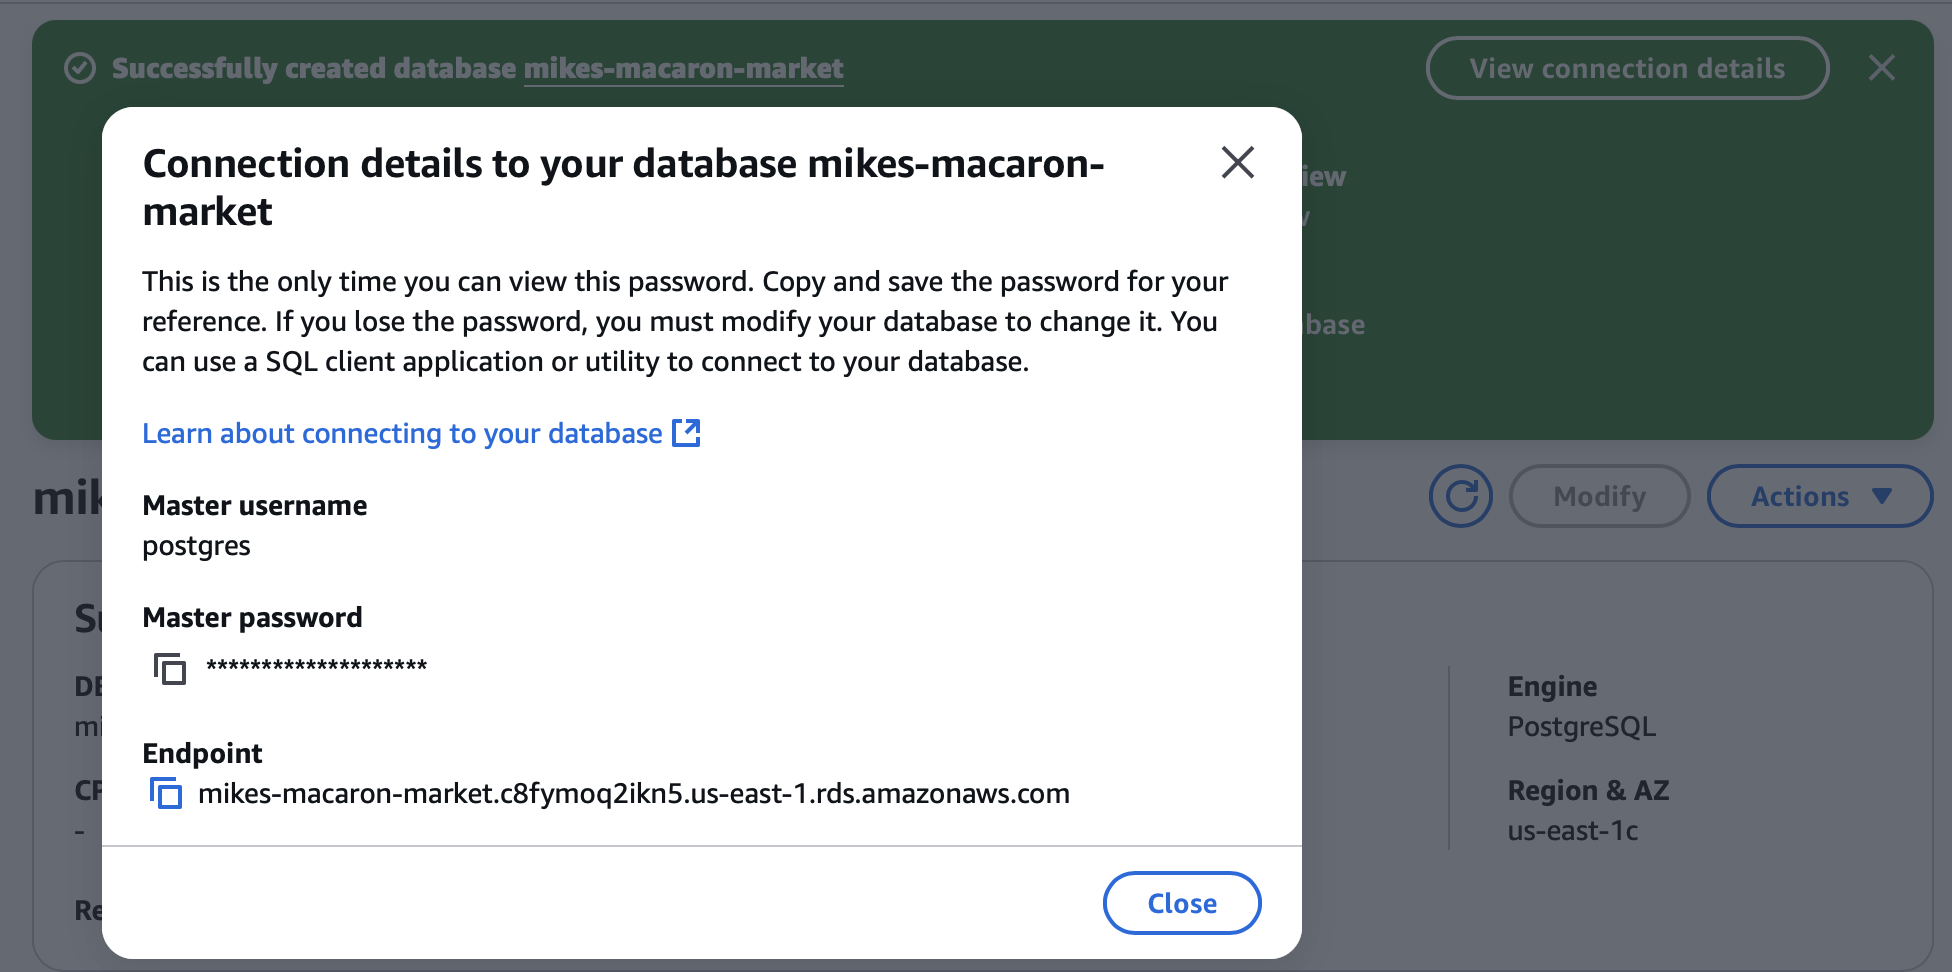
Connect to EC2 instance
Use “EC2 Instance Connect” to connect to the instance.
Some commands explanation
export S3_ACCESS_KEY=key: wherekeyis the “Access key ID” that can be found in the csv file downloaded when creating the access key in IAM>Security credentials>Create access key.export S3_SECRET_KEY=secret: wheresecretis the “Secret access key” that can be found in the csv file same as above.export DB_PASS=pwd: wherepwdis the “Master password” that can be found in the RDS dashboard or in the popup message when the database is created.export DB_ENDPOINT=endpoint: whereendpointis the endpoint of the database that can be found in the RDS dashboard or in the popup message when the database is created.npm start &: run the command in the background so that we can still use the terminaldisown: disown the job to disconnect the background job from our session
Before closing the terminal, remeber the public IP of the EC2 instance, which is needed to access the site.
Access the site
The site can be accessed through http://<the-public-ip-of-ec2-instance>:8080
Remember to specify port 8080, in my case it’s http://54.208.203.138:8080 (this IP will not work anymore since I have terminated the instance).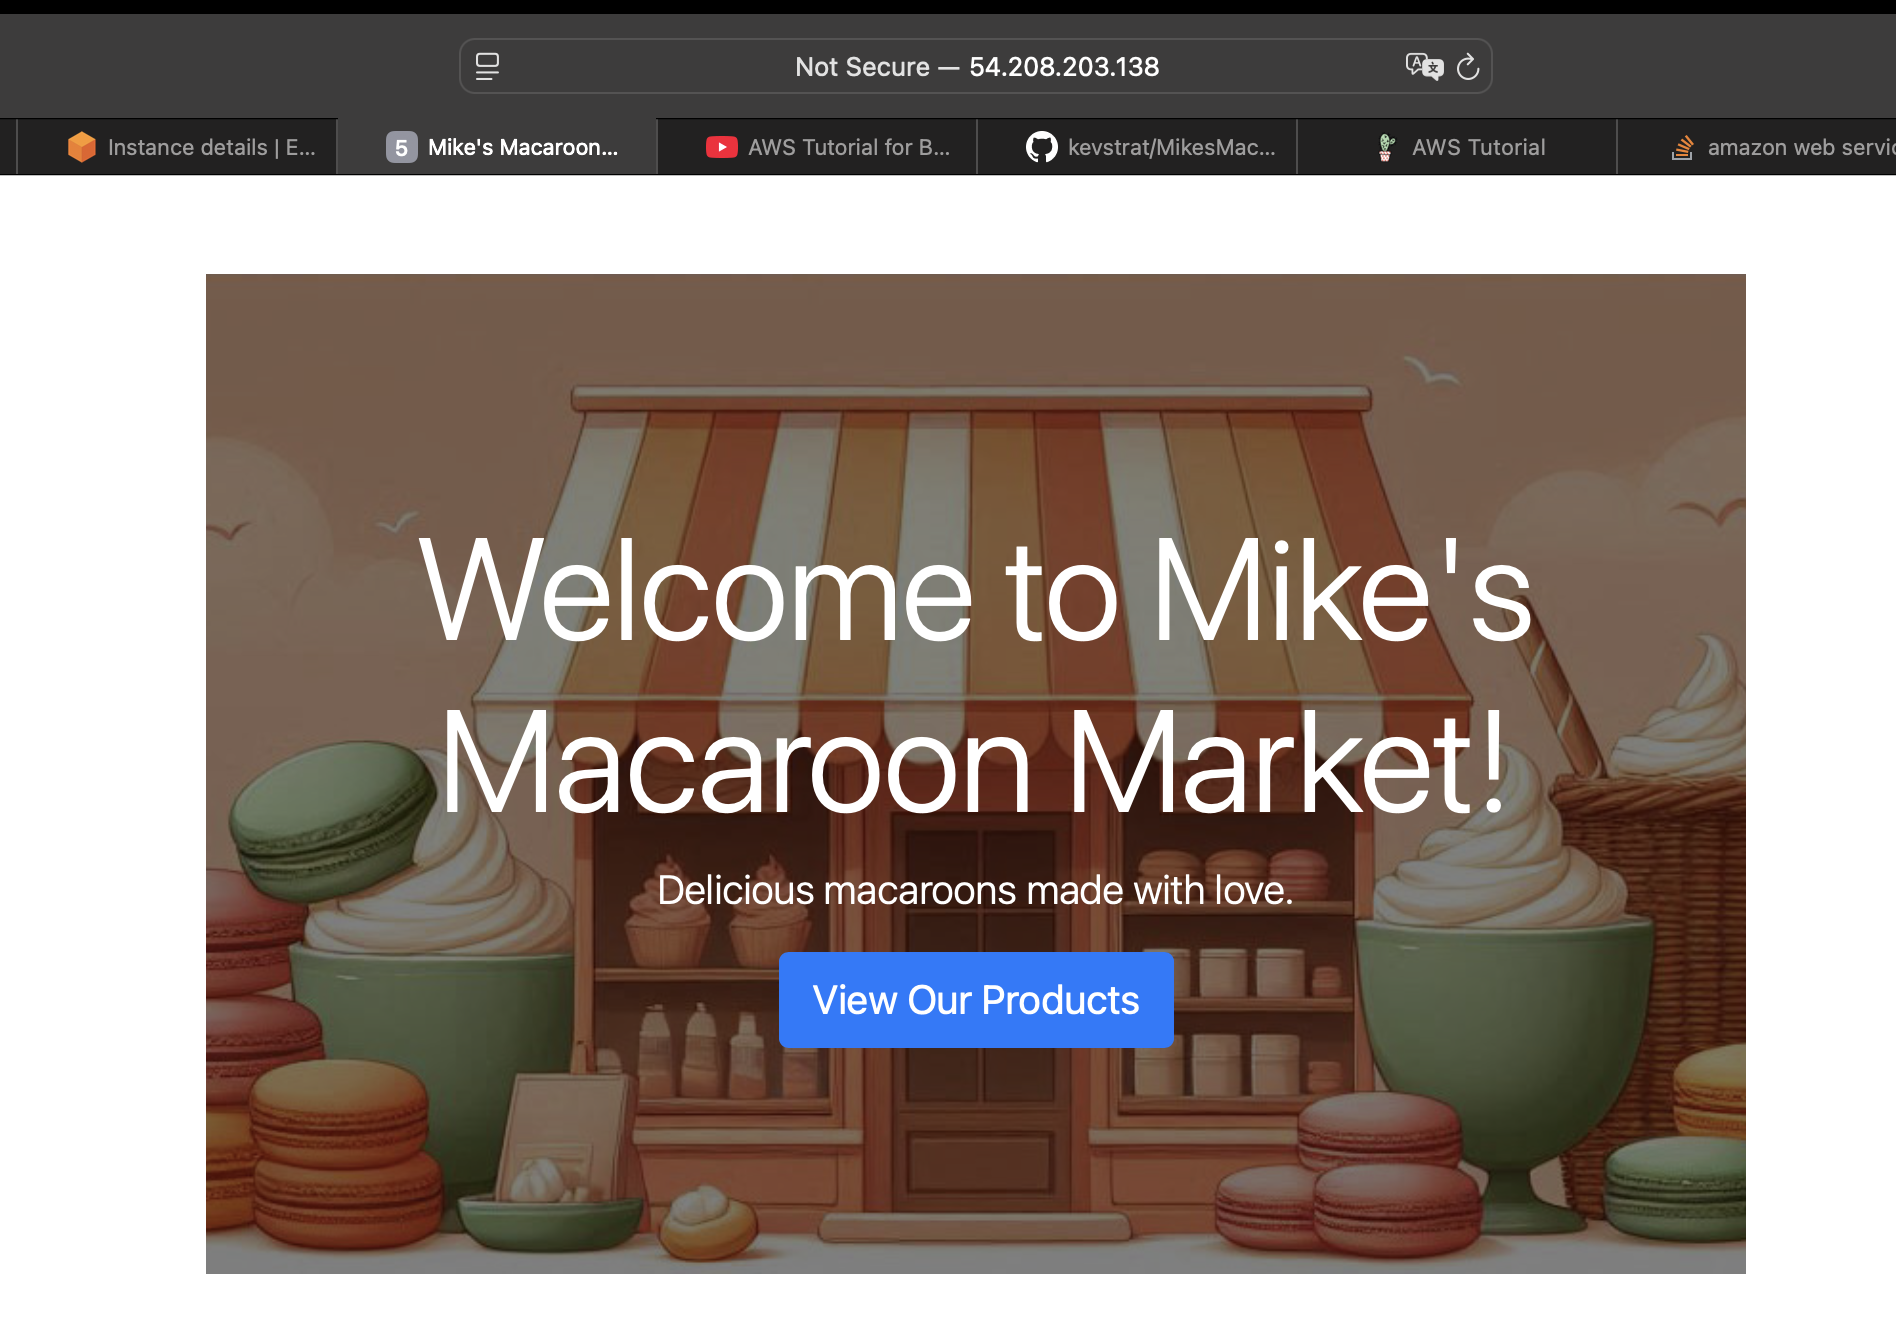
I’ve recorded the result here: https://youtu.be/UhF5I0qh2gk.
I also tried accessing the site through my phone using mobile data, and it works! See the mobile recording here: https://youtube.com/shorts/iNGrAlDeYNQ
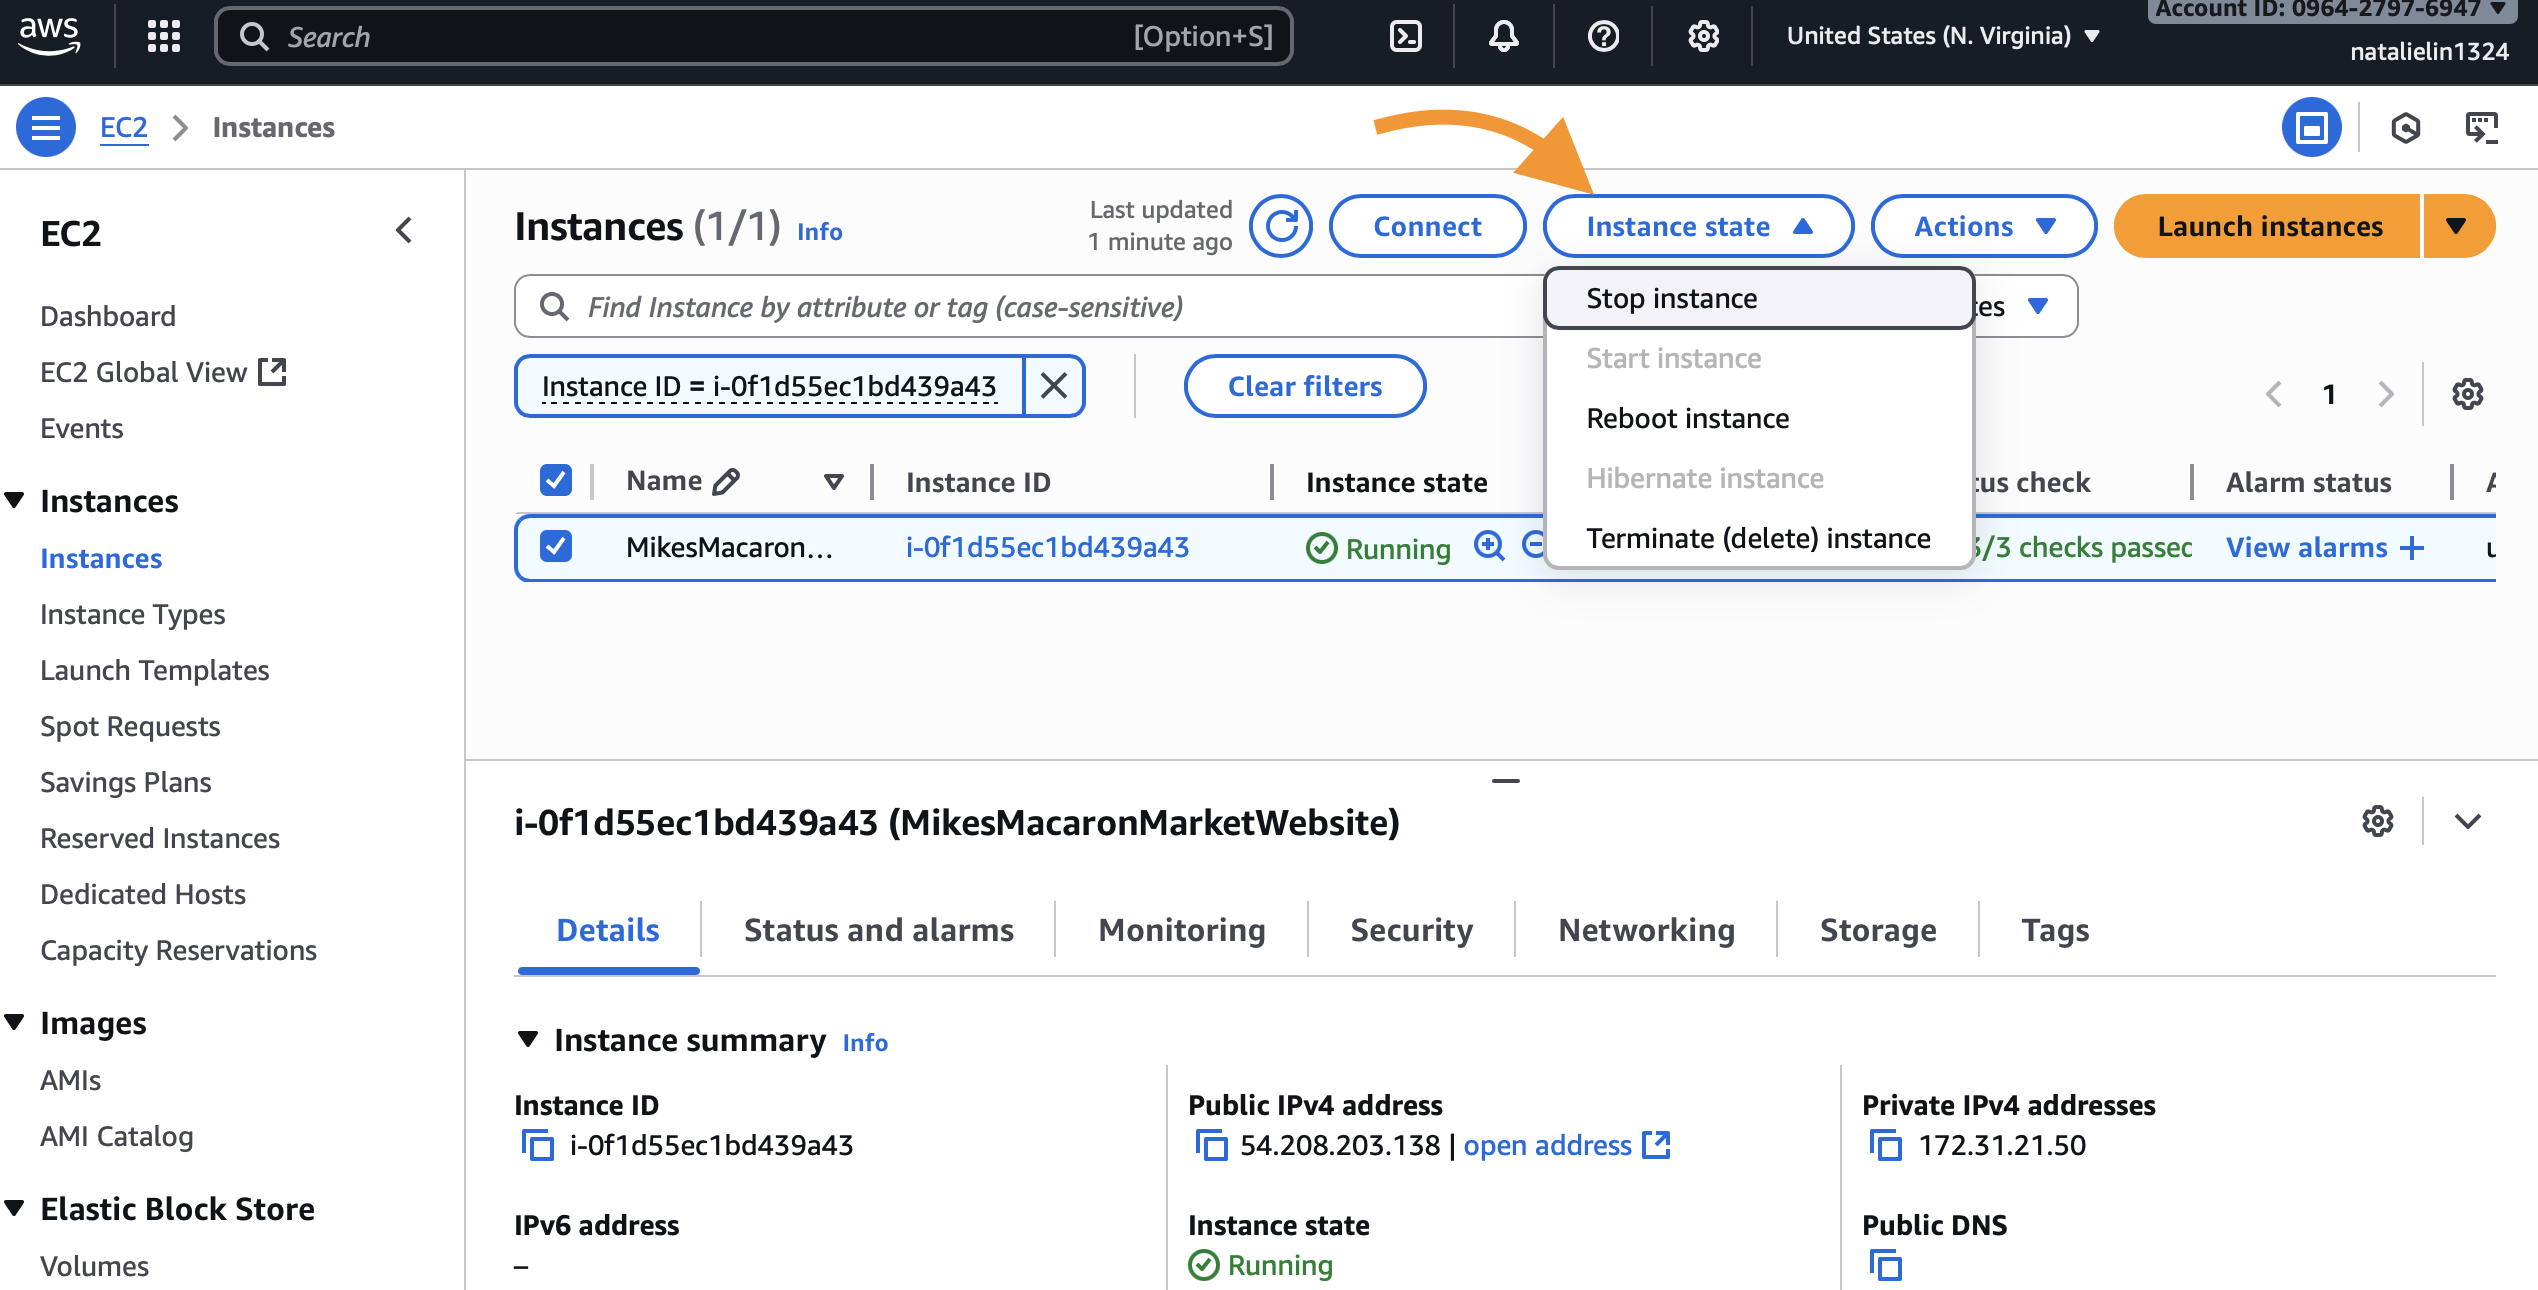
Clean up
Remember to terminate the EC2 instance, delete the S3 bucket, and delete the RDS database to avoid unnecessary charges (which is not covered in the tutorial video, probably because it’s using a free tier account)
Terminate EC2 instance
Delete security group
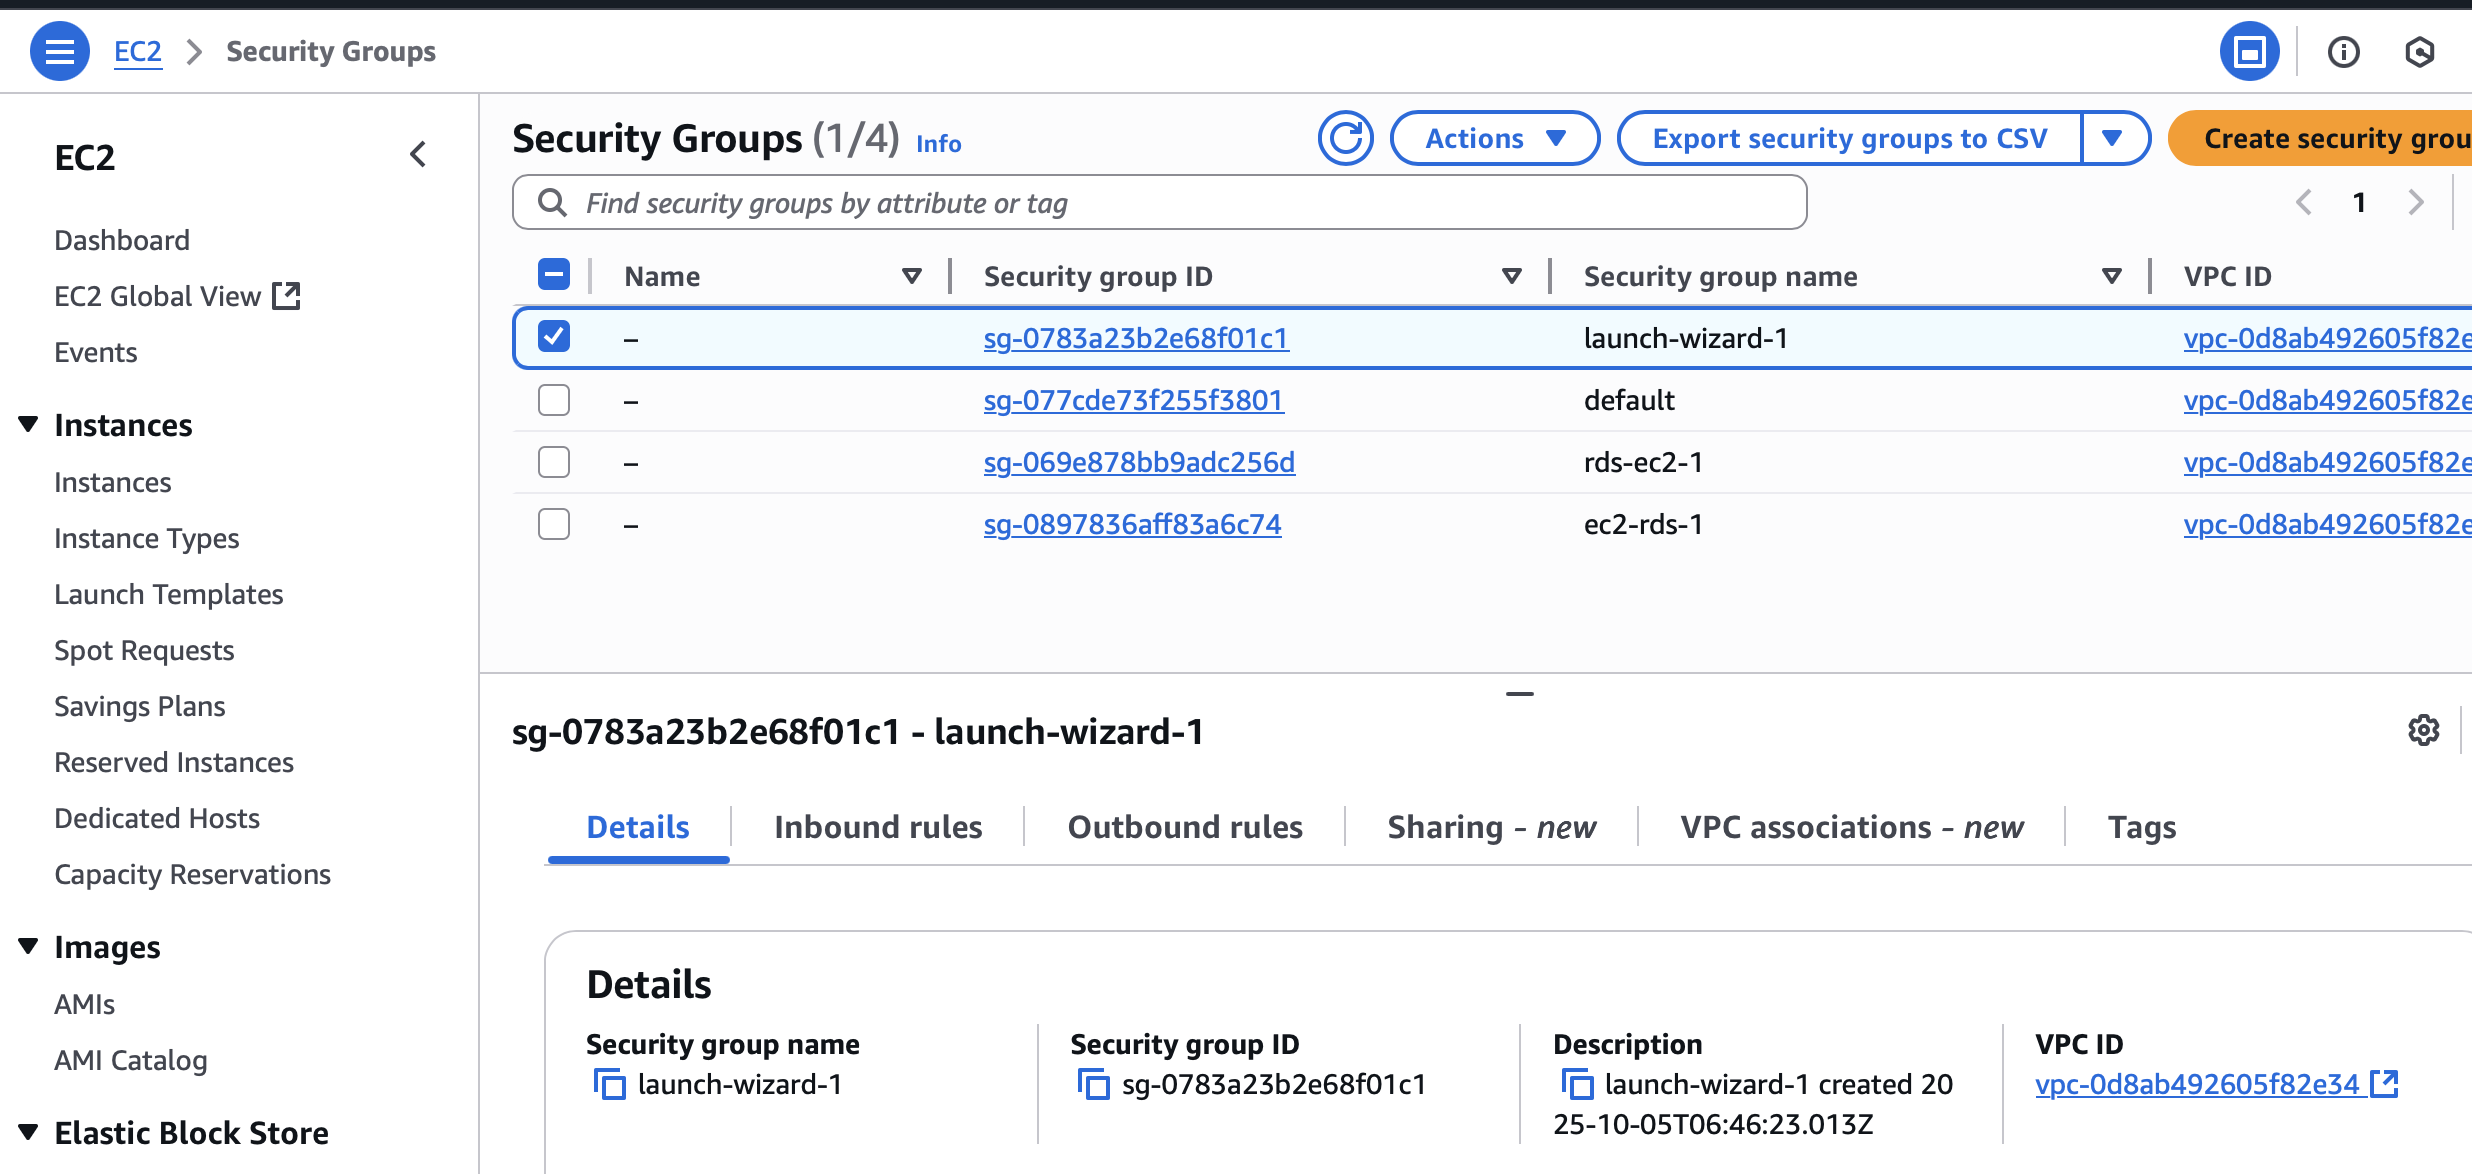
Here I bumped into mutual access issue when trying to delete the security groups rds-ec2-1 and ec2-rds-1.
It is because
rds-ec2-1allows inbound traffic fromec2-rds-1ec2-rds-1allows outbound traffic tords-ec2-1
So I deleted via console with the following steps:
- Open rds-ec2-1
- Edit Inbound Rules
- Delete the rule where Source = ec2-rds-1
- Open ec2-rds-1
- Edit Outbound Rules
- Delete the rule where Destination = rds-ec2-1
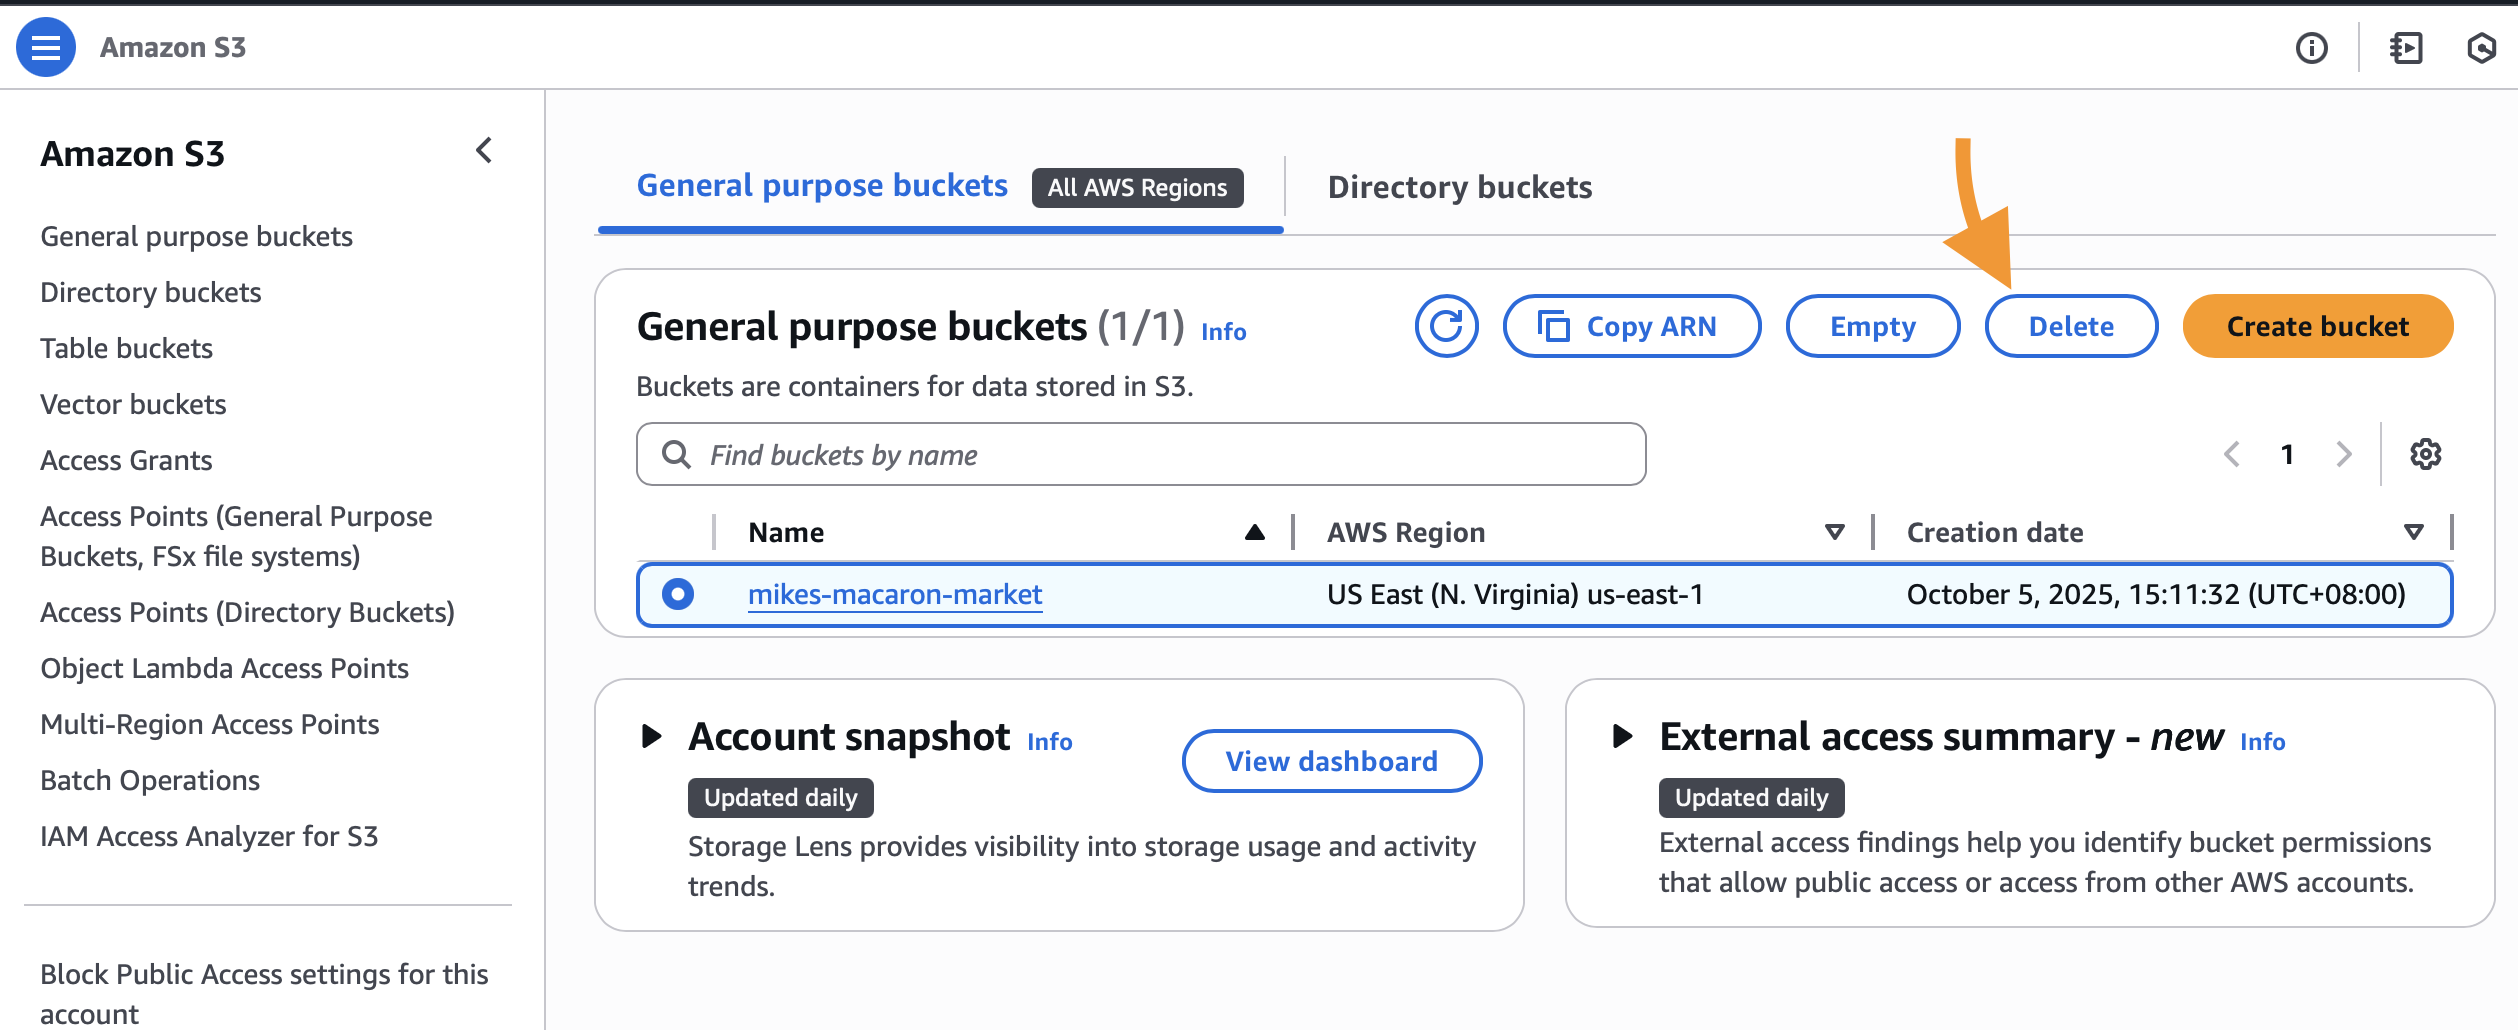
Delete S3 bucket
Delete RDS database